Sunday, September 15, 2013

Brooch Bezel With Glass Cabochon Nail Polish Tutorial


The holidays are quickly approaching (I know, I'm sorry) so now is the time to start your handcrafted gifts.
There are tons of diy's and tutorials on painting the back of flat back glass decorative stones with nail polish. 
So...I thought we should try it out but we are going to change it up a bit.

***Please Note - I apologize for the horrendous pictures in this tutorial. I'm not a very good photographer in the best conditions but photographing glass? It reflects light, it thinks it's a mirror, it was just downright ornery! So you see, the awful pictures are due to the glass's bad attitude and therefore completely out of my control. Yeah, that's it.***
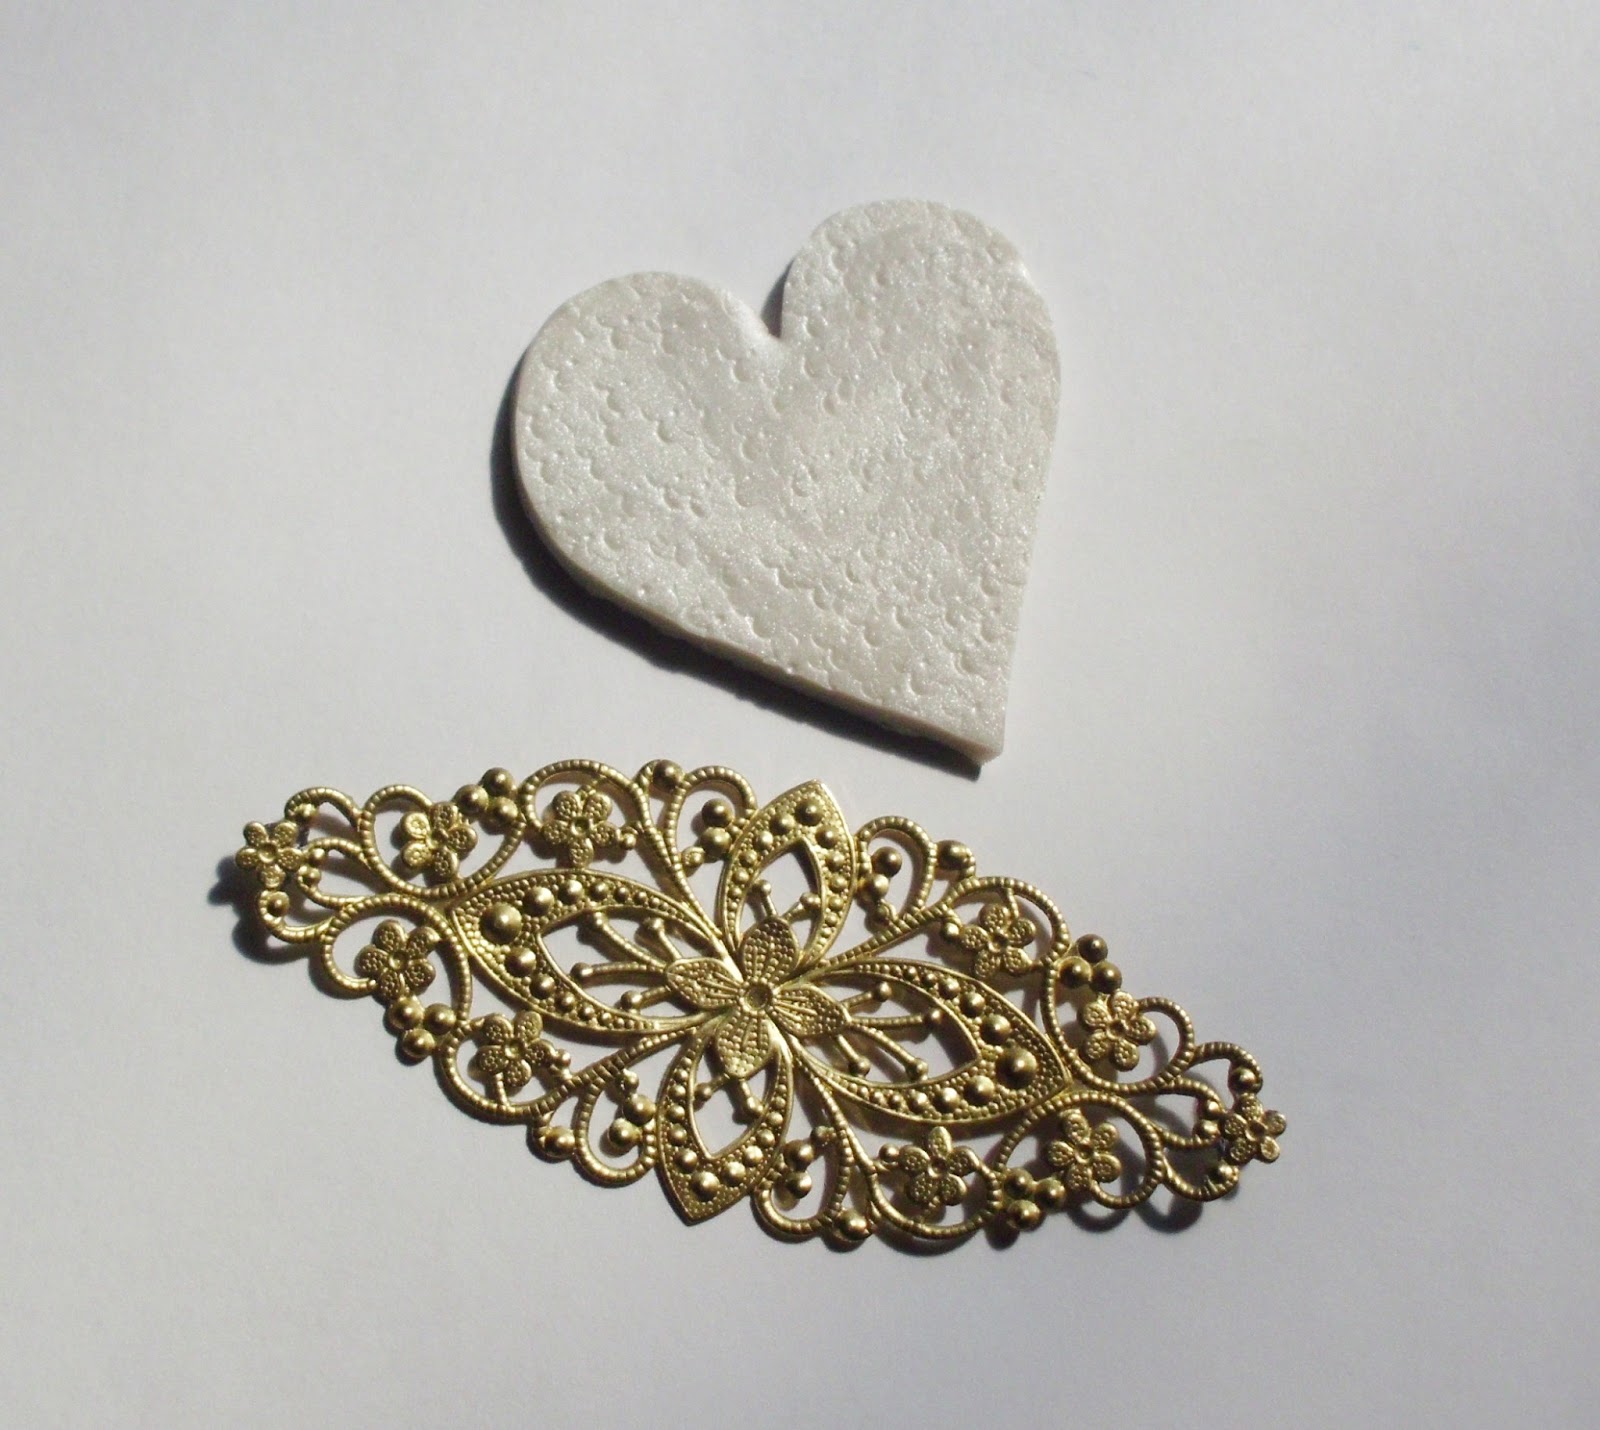

Materials list:

1. Brooch bezel with glass cabochon - Secret Solace Supplies
2. Nail polish - Of Course you can use what you already have but I didn't have any so I purchased the polish at Rite Aid - SC brand - Nail Junkie (the blue) and I Miss You (the purple)
3. Nail top coat - I used Sally Hansen from Rite Aid
4. An image small enough to fit in the brooch bezel
5. Mod Podge
6. E6000 glue
This is all you need for the brooch.
If you want to try the other items shown in this tutorial as well, add the following items:
1. Flat back glass decorative stones
2. Images to fit the glass stones
3. Crafting magnets with the sticky back
4. If you want to make your stone into a pendant then you will need a bail for each one


I cut out the tiny butterfly from this piece of scrapbook paper. You can also use photos, drawings, stickers or whatever will fit in the brooch bezel. Coat both sides of your image with Mod Podge to seal and protect it.


I brushed the glass cabochon with a thin layer of top coat and let it dry. The top coat and nail polish both dry very quickly.


Once the first top coat application dried, I applied another layer of top coat and immediately added my butterfly image. Make sure your image is upside down :) 


Once your cabochon has dried completely, brush on a coat of nail polish.


Add as many coats of nail polish as you want. Allow each new coat of polish to dry completely before adding another coat.


When you are finished adding layers of nail polish and the cabochon has dried completely, brush on a layer of top coat.


The picture above is the cabochon with 6 layers of nail polish and the finishing layer of top coat.


Place a small amount of E6000 glue in your bezel and add your cabochon. 
You're done!
This is a quick and easy gift and will be treasured by the recipient because it's handcrafted by you.
You can personalize it by using the recipient's initial or an image that is special to them.

Need more gift ideas? 
Let's use those flat back glass stones. I purchased mine at Michael's but I believe you can also find them at your local Dollar Store.
Keep in mind these stones are not perfect. They have flaws and they are not perfectly round. The flaws in the stones will more than likely cast shadows on your image. I think they are lovely anyway, I just wanted you to be aware.


I cut the word "DREAM" from a sheet of scrapbook paper I already had in my stash. 
You make these stones exactly the same as the brooch but without the bezel.
You may:
1. Make them into magnets by attaching a sticky back magnet to the back of the stone.
2. Make them into pendants by gluing on a bail with E6000 glue. Add a ribbon or chain for a necklace.
3. Attach felt to the back, turning them into a paperweight or just a pretty accent piece.
I'm sure you will think of many more useful and clever ways to use them!


In the photo above, I just used the top coat and nail polish without an image.


Here is the brooch bezel with the plain glass cabochon.


I LOVE, LOVE, LOVE Agatha Christie!!!
Here is a set of 4 magnets with images of Agatha Christie books.
Did I mention I LOVE Agatha Christie?
What a great gift set this is! Make a set that is meaningful to the recipient and package them in a sweet gift box.
This set wants to live with me and I promised it I wouldn't give it away :0)


Thank you so much for visiting my blog!

Wednesday, April 3, 2013

Rolled Rose And Heart Pendant Polymer Clay Tutuorial


I call these little roses "rolled roses", please let me know if that is incorrect and what the proper name is :)

Materials list:
Polymer clay for the rose. I used a mix of magenta, translucent and pink.
Polymer clay for the leaves. I used a mix of black and yellow - I still can't find the green :(
Polymer clay for the heart. I used pearl.
Something to make a hole in the heart - wire, clay tool, toothpick, whatever you have.
Craft knife or razor blade to cut the heart out.
**Optional**
Something to texture the heart.
Liquid polymer clay.
Mica powder - I used pearl.
Paint brush for the mica powder.

Make the heart.
I flattened my clay and then just rolled it with a glass. I was too lazy to get my pasta machine out.
Cut a heart shape free hand. It does not have to be a perfect heart.


Texture your heart or....not. I used a brass stamping from my Etsy shop.


Make the roses.
Roll your clay into a snake or log. Flatten the clay with your fingers. Roll the clay against itself until the rose is the size you want. Cut the excess clay off in an angle and trim the excess clay off the bottom. Pictured below is the largest rose I made.


Then I made 2 more roses in the exact same way. A medium and a small. Of course, make as many roses as you want.


Make the leaves.
Roll your clay in a ball and then flatten the ball. Shape the clay pointed at one end to resemble a leaf.
Make lines in the leaf to resemble veins. I used the razor blade to make the veins.


Make a hole in the heart if you are making this into a pendant. Keep in mind that the way your heart lays while worn is dependant on where you place the hole.
You can skip this step and use the heart to decorate a journal, jewelry box, etc.


Time to assemble.
I used liquid polymer clay on all my pieces but you don't have to.
Place your leaves on the heart.

Now add your largest rose.


Arrange the rest of your roses the way you like them.


I brushed my heart, leaves and roses with pearl mica powder before baking.


Bake the heart according to the directions on your polymer clay package.
I baked mine at 275 degrees for 10 minutes.

I placed a jump ring through the hole in the rose. I added a chain and then finished the ends of the chain to make a necklace.


I hope you have enjoyed this tutorial.
Thank you for visiting my blog :)


Wednesday, March 20, 2013

Polymer Clay Rose With Bezel Tutuorial


I really like the way this pendant turned out. So...I wanted to share it with you :)

********PLEASE NOTE - TOU FOR THIS TUTORIAL********
You may use the items you make from this tutorial in any way you want. Make it for yourself, as a gift, or sell what you make. Sell the items on any online venue or any off line location you want. I will be selling these on Etsy in my BareMoose shop but feel free to sell them in your Etsy shop as well.You do not have to give me credit for the design. All I ask is, if someone inquires where they can purchase the supplies to make this pendant, please refer them to my Etsy supply shop - Secret Solace Supplies


Okay, let's get started!

Supply and tool list
1. Polymer clay - I used Sculpey Accents - blue and Sculpey yellow and black
2. Liquid Sculpey - optional
3. Heart bezel - SecretSolaceSupplies
5. Heart clasp - SecretSolaceSupplies
6. Something for texture - SecretSolaceSupplies
7. Jump rings - 3
8. 2 pairs of pliers for attaching jump rings
9. craft knife, piece of wire or toothpick to make veins on leaves                                                  


I already have a polymer clay rose tutorial on this blog and my Bare Moose blog so I am just recapping here.


I have a chart below on making the leaves and tendrils.
I'm sorry, I really should have used black ink. If you have any questions, let me know in the comments.

For the green clay, I kneaded equal parts of yellow clay and black clay together simply because I couldn't find my green clay. It turned out nice so you may want to try it :)


Set the rose, leaves and tendrils aside. We are working on the bezel now.

Apply liquid polymer clay to the inside edges of the bezel. This step is optional. I have made these without the liquid polymer clay and they stayed in the bezel fine. But...I am selling these so I want to make sure they will last a long time.
Make a long snake with black polymer clay.


Outline the bezel with the black clay and press the clay into the bezel. You do not have to cover the entire bezel but mine just happened to work out that way. If you want, add more liquid clay as you go.


Once you have pressed all the black clay into the bezel, add texture.
We are applying and texturing the clay into the bezel so it will not matter if the bezel shows when we are done. Actually, it looks really nice if you can see some of the black textured clay in the end.


So here it is. Covered (with the exception of a tiny line on the left) and textured.


Now we need to apply the leaves. I used 3 leaves but of course, use as many as you want. I put a dab of liquid clay on each leaf and placed them on the bezel.


Time for tendrils! This is really fun, just play with it to get the look you want. I used the wire (that I used to make the veins on the leaves) to wrap the clay around for little curly cues.


I put the tendrils on the bezel, tore off the excess clay and rolled the end into a point. Once finished with the tendrils, I just put a dab of liquid clay under them.


Now put a generous amount of liquid clay in the center of the bezel. This is where we will place the rose.


And...here it is :) Cute, right !?!
Now bake your bezel. I baked mine on 275 degrees for 10 minutes. The clay package says 30 minutes for every 1/4" of clay. DO NOT BAKE THIS FOR 30 MINUTES. Sorry about shouting but I baked one for 30 minutes and it fried my bezel and turned my light pink clay to black. The smell was nauseating!!
Now that you have baked and cooled your pendant, let's make it into a necklace.
I cut my chain, using wire cutters, into an 18" length. Use your pliers to open a jump ring, place one end of the chain and the heart clasp onto the jump ring. Close the jump ring.
Open another jump ring and place the other end of the chain onto the jump ring. Close the jump ring.
Open your last jump ring, place the pendant and the center of the chain into the jump ring. Close the jump ring.


Here is the completed necklace.


I made 3 other pendants. 
For the large heart, I used this bezel - SecretSolaceSupplies which is a very large heart bezel. I made a loop at the center bottom of the heart with the tendril. I selected a pretty, light blue briolette and topped it with a nice copper filigree end cap. I wire wrapped the whole thing with lovely square copper wire and attached it to the tendril circle with a jump ring. Of course, you could wire wrap it directly to the tendril but I wanted the briolette to have more movement.

The pink rose was done in the exact same way as the pendant in this tutorial.

The blue rose in the oval pendant was made using this bezel - SecretSolaceSupplies .


I hope you enjoyed this tutorial. Thank you so much for visiting my blog :)